
How To Operate Your Artificial Christmas Tree Branch Machine

Artificial christmas tree branch binding machine is an important machine in the production of artificial Christmas trees. This article will summarize some frequently asked questions, focus on the settings of the operation panel, and introduce how to operate the tying machine. We ensure that each step is accompanied by pictures to prevent distortion of the communication.
Safety Tips
This machine is a semi-automatic production equipment, and its operation is basically carried out on the operation panel. There is a high-voltage motor in the electrical cabinet of the equipment. It is strictly forbidden to open the electrical cabinet when the machine is running. If you need to open the electrical cabinet, please turn off the external power first, make sure the machine is stopped, and then open it by a specialist. Maintenance work must be performed by trained professional electricians.
For safety, grounding engineering must be implemented to ensure the safety of equipment and personnel. When performing equipment maintenance or machine maintenance, all power and gas sources must be cut off.
Initial Interface

After turning on the machine, if the operation screen enters this page, it means that the machine has been started. At this time, touching any position on the screen will enter the operation interface.
The operation screen is set to dual-language operation interface (Chinese and English) and single-language operation interface (Chinese) according to user needs. The machine defaults to single-language operation interface (Chinese) when it leaves the factory. If you need to adjust it, please click English Interface on the interface to enter the English operation interface.
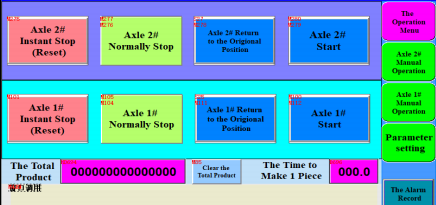
When you see this interface, it proves that you have successfully entered the operation interface.
User Interface
In the operation picture of the double-axle branch binding machine, two groups of equal function buttons for Axle 1# and Axle 2# are to be displayed. The button of Axel 1# corresponds to the operation of the first branch binding axel (the below one), and the button of Axle 2# corresponds to the second one (the above one).
There is only one group of function buttons for the single axle branch binding machine.
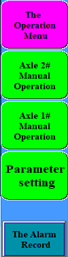
This line of buttons are for page shift. Hit the button, you will go to the corresponding page. The pink button indicates the current page, and the green buttons point to the pages you need to go to. These buttons exist on every operation page for the page shift.
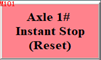

The two Axle Emergency Stop buttons have the same function respectively control the emergency stop of Axle 1# and Axle 2#.Once the Emergency Stop key is hit, the machine stops at once, the air cylinder returns to the original state and the motor stops running.
You’d better to push the Emergency Stop button every time before starting the equipment in order to stop any action not closed, such as the button continuing in the manual operation. In emergency, hit the Emergency Stop button to stop the respond branch binding axle. There is only one Emergency Stop button on the single axle branch binding machine.
There is a red Emergency Stop button on the touch panel to stop the both axles. When it is pushed, the two axles stop running in the meantime, and the air cylinder returns to the original state and the motor stops running while the winding servo motor is disabled so that it can be turned as you like. This button is suggested to be pushed on while threading for the sake of safety and convenience.
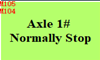
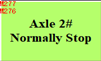
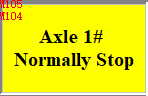
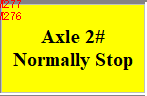
When the green Axle Normal Stop No.1 or No.2 is pushed, the button colour will become yellow.
The machine will not stop at once until a piece of product is finished, then the button will be reset. To press this button may stop the machine during normal production.


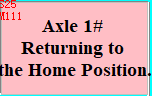
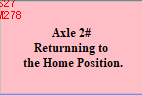
When the button Axle 1/2# is pressed, the button color turns from blue into pink This indicates the corresponding branch binding axle is returning to the home position. This state will continue until the machine finds the home position. And the buton will be automatically reset when the the home position is found. Notice: Before the button is reset, you can not press the Start button to start the machine normally.
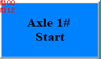
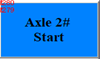
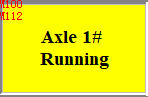
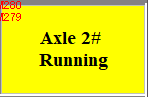
When the button Axle 1/2# is pressed, the button turns into yellow,indicating the corresponding branch binding axle has been started to be working and you can display the leaves to bind branches. When the Emergency Stop buton or Normal Stop button is pressed or the Emergency Stop Switch is turned on, the button will automatically return from running state to starting state.

This shows the total output. Clear the Total Product button is used to delete the data of output.

This shows the time to finish one piece of product. It will shift automatically after every piece is completed which helps to estimate the output of one day and to evaluate the production efficiency.

This place is blank during the normal state. The alarm tape will be shown here when breakdown appears. The fault may be found quickly according to the content displayed.
Manual Operation


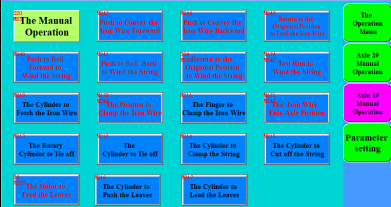
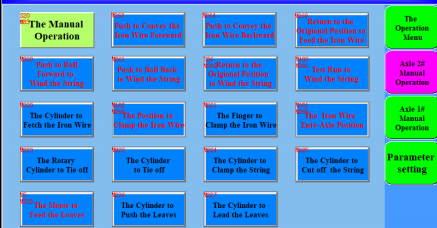
The double axle branch binding machine owns two manual operation pages for Axle 1# and Axle 2# relating to the hand operation of these two axles. The single axle branch machine has only one manual operation page. Press the button Axle 1/2# ,you can go to the manual operation page as Picture 3 and Picture 4. The executive component of the red words button is the motor while the air cylinder of the black words button.

Press the button Green and it becomes yellow.Now you can operate any organization with your hand. Only when you press any other button, there will come the corresponding act. Another pressing makes the button reset.


To keep pressing the button push to convey the iron wire forward makes the stepping motor to convey the iron wire move forward (approaching to the rotation axle).The motor willstop when the button is released.
To keep pressing the button push to convey the iron wire backward makes the stepping motor to convey theiron wire move backward (away from the rotation axle).The motor will stop when the button is released.
These two buttons are used to look for the position to clamp the iron wire.Notice: These two buttons can not be pressed and held on together.


The button return to the original position to feed the iron wire will change into just returning to the home position when pressed. Then the stepping motor to convey the iron wire looks for the home position automatically.If the home position is not found, the button keeps this state and it will restore whenthe home position is found. When there is a fault, press Reset to look for the homeposition again.

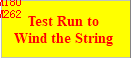
The button iron wire eate-axle position will change into test run to wind the string when pressed and the winding servo motor turns for ten rounds according to the winding string speed set in advance. After that the button will restore.


To press the button the position to clamp the iron wire makes the stepping motor to convey theiron wire move to the position to clamp the iron wire. To press the button the iron wire eate-alxe position makes the stepping motor to convey the iron wire move to the positionfor the iron wire to enter the axle (where the cylinder to fetch the iron wire drawsback). After that the button will restore. Notice: When the stepping motor is at thetarget position, it will not move when the button is pressed.


When any of the following buttons is pressed, its ground color will become yellow and the corresponding cylinder will act. Another pressing will make the button restore, and the cylinder will go back to the home position.

eep pressing the button,and the stepping motor to convey the leaves will run in the conveying leaves direction. It will stop when the button is released. The clamping slot can be adjusted to the proper location by either stirring forward or backward directly with your hand
Parameter settings

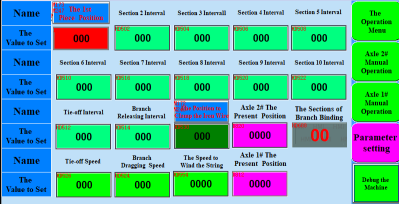
Press the button and you can go to the page for the parameter setting as picture

This button to the location of the first piece of leaf.Generally the number does not need to amend or set. In the special case, it should beamended according to the situation in the range from 590 to 690. Press the positionbutton, and the stepping motor will move to the planned position.
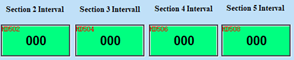


From the second to the tenth leaves section, the section interval is thedistance between this section and the front one set according to the need of theproduct.The unused section is set as zero.The interval between every section is between 0 to 200mm.The branch dragging speed refers to the speed to run the above interval. This speed is used to adjust the density ofthe string. The larger thenumber is, the faster the speed is, and the less string is wound, and Vise Versa. Therange is from 10 to 600.


The tie-of interval refers to the space between the last section leaves and the tie-off to end the winding. The range is from 0 to 600 mm.The speed to tie off is the speed to run this interval. The range is from 10 to 600

The branch releasing interval means the distance to run after finishing,binding before the finger releases the branch. The range is from 10 to 600 mm.

The iron wire clamping position shows where the finger clamps the iron wire. This is to set according to the length of the iron wire. The range is from 0 to 600 mm.
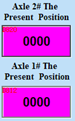
The present position of axle 2# and axle l# buttons show the positions of the corresponding stepping motor to convey the iron wire of axle No.2 and No.1. Itis used to set the position to clamp the iron wire. The number here can not be changedThere is only one The Present Position for the single axle branch binding machine.

The speed to wind the string is the rotating speed of the rotationaxle. The range is from 100 to 3000. The larger the number is, the higher the speed is.and the more string is wound. And Vise Versa.

The Sections of Branch Binding refer to the sections of the branchto produce . The value ranges from 2 to 10. The value beyond the range can not be set

Debug the Machine refers to that the professional technician adjusts the running program of the machine according to the products features. It is to set more debugging parameters for the process of more styles and sizes of products Password is needed to enter the debugging picture.
Debug The Machine
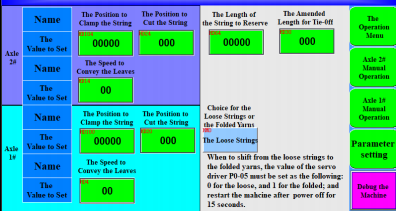
The Debug the Machine picture is used to set the parameters to adjust the program aiming at different size of products. To change the parameters on the page can meet the need of the branch binding process of most products. Since the meaning of the parameters is quite professional, we suggest the parameters be set by the specialized technician. Press the button debug the machine on the setting page of axle No.2 (the setting page of the single axle branch binding machine is on the Setting page), and apassword input box will pop up. Input the password 20180501 exactly, and you canenter the debugging page, as Picture.

The position to clamp the string is the location the string stay in after finishing winding. If the position is not between the string clamping fingers, it must be adjusted by adjusting the value. This value should be adjusted to ensure the string to stay in the correct position for clamping when the tuming Home Position Switch gets loose or is exchanged. The range is from 1,450 to 1,700. There is one parameter setting box for axle l# and another for axle 2# used to adjust the corresponding value.

The speed to convey the leaves is the running speed of the conveying motor, The range is from 10 to 60. There is one parameter setting box for axle 1# and another for axle 2# used to adjust the corresponding value.

The length of the string to reserve is the length to draw out for the next piece of product to be wound smoothly after one is finished. The range is from 10,000 to 25,000. The larger the value is, the longer the string will be reserved.

The position to cut the string is where the iron wire conveying motor stays after the tie-off is finished and the the string-cutting cylinder reaches out.The string is cut when the cylinder withdraws. The range for the value to be adjusted is from 10 to 500. There is one parameter setting box for axle l# and another for axle 2# used to adjust the corresponding value.

The amended length for tie-off is the back running distance of the branch drawing motor after the tie-off interv all is covered that makes the tie-off easy. The range is from l0 to 500.
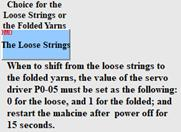
Choice for the Loose Strings or the Folded Yarns is used to choose the loose strings or the folded yarns to wind. When the button displays the Loose String, the string to wind is loose. When the button shows the Folded Yarns, the string to wind is folded into yarns. Notice: When to shift between the Loose Strings or the Folded Yarns, the value of the servo driver P0-05 must be set.0 for the loose string, and 1 for the folded yarns. Then tum off the power for 15 seconds before tuming on the power again.
The Daily Maintenance
The Quality Request for the Compressed Air: The compressed air must be clean and dry without synthetic oil, water, salt or corrosive gas to prevent the cylinder valve from bad movement. Either water or dust may make the mental parts rusty and damage the moving parts which may make jam and the air pressure information transmits abnormally.
The linear guide way of the sliding platform is very easy to get dust that leads to the accumulation of dust inside the mode group of the linear guide way. So we must keep the environment clean, reducing the resource of dust.
It can reduce the abrasion of the linear guide way to use the rail oil to lubricate it regularly and extend the service life of the equipment.
A lot of dust, thread particles, leaf scraps produced during the process are easy to enter the moving joints of the gas cylinder to cause the action not smooth. So the operator should make a complete cleaning before getting off work. Blow away the sundries on the machine platform with the pneumatic gun and clean the finger joints of the cylinder fingers regularly.
In order to prevent the equipment from getting rusty, most parts are made of aluminum alloy. Please do not strike or impact the parts in the course of usage or maintenance to avoid any damage that influences the normal usage of the equipment.
Disclaimer: Since the product is being improved and upgraded continually, please forgive us when your manual is not updated Related: How To Make An Artificial Christmas Tree | View All Machinery Series.